
Linking sounds in connected speech is the difference between careful textbook pronunciation and the way fluent English is actually spoken. In ESL teaching, “connected speech” refers to what happens when words meet in real time: sounds link, disappear, weaken, or change so speech flows smoothly. Linking is one of the most important parts of that process because it directly affects listening comprehension, rhythm, and natural speaking. I have seen learners with strong grammar and a wide vocabulary still sound hesitant because they pronounce every word boundary separately. They say “pick / it / up” instead of “pickitup,” or “go / out” instead of “gowout.” Native and proficient speakers usually connect these boundaries automatically. For learners, mastering linking sounds improves intelligibility, reduces choppy delivery, and makes fast spoken English easier to decode in conversations, podcasts, meetings, and exams.
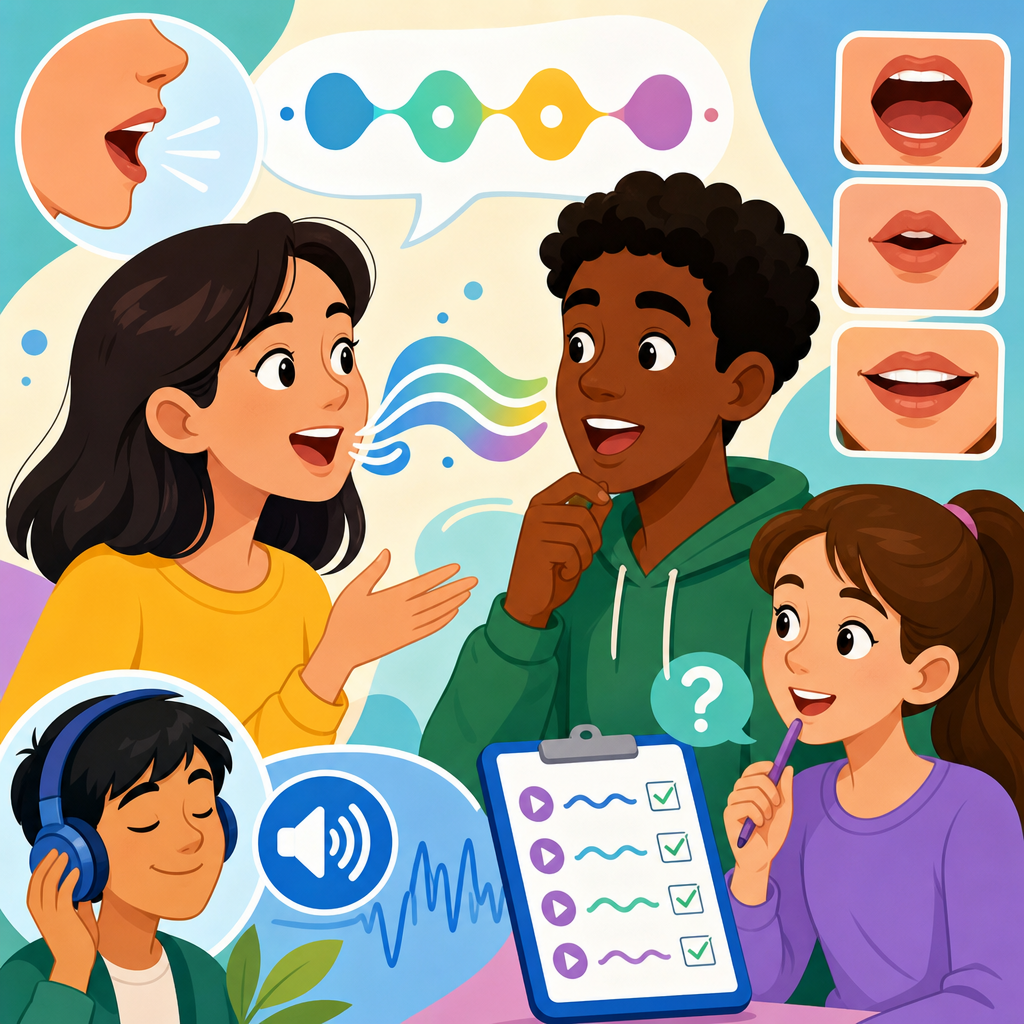
This hub page covers the miscellaneous side of linking sounds in connected speech for ESL: mouth position, practical audio tips, common linking patterns, drilling methods, and a short self-check quiz. “Mouth position” means the physical placement and movement of the lips, tongue, jaw, and soft palate as one sound moves into the next. “Audio tips” means techniques for recording, slowing, shadowing, and comparing speech so learners can hear what their mouths are actually doing. This matters because English is stress-timed, not syllable-timed. Strong beats carry meaning, while unstressed parts compress and link. If you learn linking systematically, your speech becomes smoother without sounding forced, and your listening improves because you start recognizing chunks instead of isolated words. That makes this topic a practical hub for broader speaking work, including fluency, rhythm, reductions, and conversational confidence.
What linking sounds are and why learners struggle with them
Linking sounds happen when the final sound of one word connects to the initial sound of the next word with little or no pause. The most common patterns are consonant-to-vowel linking, vowel-to-vowel linking, and repeated or similar consonant linking. For example, “turn off” usually sounds like “tur-noff,” “see it” often sounds like “see-yit,” and “big game” may feel like one long phrase rather than two separate words. Learners struggle because spelling hides what speech does. English orthography suggests firm word boundaries, but spoken English prioritizes ease of articulation. In class and coaching sessions, I often find that students are not failing to hear English; they are hearing linked speech through the filter of written words, so their brains search for boundaries that are no longer acoustically obvious.
Another reason linking is difficult is transfer from a learner’s first language. Speakers of languages with clearer syllable boundaries may insert pauses or glottal stops where English would glide. Others may pronounce every consonant release strongly, which creates unnatural breaks. The problem is not just sound knowledge; it is timing and coordination. Linking requires the speaker to plan across words, not one word at a time. That is why isolated pronunciation drills help only up to a point. To improve connected speech, learners need chunk-based practice such as “a lot of,” “next year,” “take it out,” and “I agree.” These chunks train the mouth to move continuously, which is closer to how real speech works in interviews, customer calls, presentations, and everyday conversation.
Mouth position: how the lips, tongue, and jaw create smooth transitions
Mouth position is the physical foundation of linking. If the articulators are tense or reset between words, linking breaks down. In consonant-to-vowel linking, keep the final consonant ready and release it directly into the next vowel. In “pick it up,” the /k/ closes at the soft palate, then the tongue drops into /ɪ/ without a pause. In “made of,” the /d/ releases straight into schwa. In vowel-to-vowel linking, English often inserts a light glide. After a front vowel such as /iː/ in “see it,” the tongue is high and forward, so a brief /j/ glide appears naturally. After a back rounded vowel such as /uː/ in “go out,” the lips are rounded, so a brief /w/ glide often appears. These are not extra words; they are transition sounds created by efficient movement.
Jaw stability also matters more than many learners realize. If the jaw opens and closes too dramatically, speech sounds segmented. Smooth speakers make smaller, faster adjustments. The tongue does most of the precise work. For /t, d, n, l/, the tongue tip is active at the alveolar ridge just behind the upper teeth, so phrases like “put it on,” “need it,” and “all of” become easier when learners feel that contact point. Lip rounding is key for /w/ transitions, while spread lips support /j/ transitions. Record yourself saying “go out,” “do it,” “my aunt,” and “be on time.” If you hear a break, check whether your lips and tongue are resetting. In my experience, the fastest gains come when learners practice movement pathways, not just individual sounds. Pronunciation is athletic coordination, and linking is one of its clearest examples.
Core linking patterns every ESL speaker should practice
Not every word boundary links in the same way, so learners benefit from a clear set of patterns. Start with the most productive ones and practice them in high-frequency phrases. The table below gives a practical overview.
| Pattern | How it works | Example | What to do with your mouth |
|---|---|---|---|
| Consonant + vowel | Final consonant joins the next vowel | pick it up, turn off, read it | Hold the consonant closure, then release directly into the vowel |
| Vowel + vowel with /j/ | A light /j/ glide often appears after front vowels | see it, he asked, I agree | Keep the tongue high and forward, then glide into the next vowel |
| Vowel + vowel with /w/ | A light /w/ glide often appears after back rounded vowels | go out, do it, too old | Maintain lip rounding briefly before opening into the next vowel |
| Similar consonants | Two close consonants merge or lengthen | big game, last time, red door | Avoid releasing twice; make one clean, longer transition |
| Linking /r/ in non-rhotic accents | /r/ may appear between vowels when the spelling has final r | far away, your idea | Use a light /r/ only if that accent pattern is natural for your target model |
These patterns explain much of everyday English. Consonant-to-vowel linking is the biggest priority because it appears constantly. Vowel-to-vowel linking matters for smoothness and listening, especially in phrases like “I agree,” “she always,” and “go in.” Similar consonants are often missed because learners over-pronounce both words, producing “las-t time” instead of a cleaner “lastime.” Accent also matters. In American English, post-vocalic /r/ is usually pronounced, so “far away” naturally includes /r/. In many British, Australian, and New Zealand accents, linking /r/ appears when the next word begins with a vowel, even if /r/ is otherwise not pronounced. The key is consistency with your target accent, not mixing rules randomly.
Audio tips that make linking easier to hear and fix
Most learners need better feedback, not more theory. The first audio tip is to use short clips, ideally five to ten seconds, from reliable sources such as BBC Learning English, VOA Learning English, TED, Elllo, or exam listening materials from Cambridge. Play one sentence three times. First, just listen for meaning. Second, mark where words connect. Third, repeat with the speaker. This trains top-down and bottom-up listening together. I recommend slowing audio to 0.75 speed only after listening at normal speed once. If you slow first, you may learn an artificial rhythm. Apps and tools such as YouGlish, Audacity, Praat, and smartphone voice memos are useful because they let you compare your waveform, timing, and pauses with a model.
Shadowing is especially effective for connected speech. Listen to a short phrase and repeat almost immediately, matching not only sounds but pacing and stress. Start with chunks such as “a lot of people,” “out of it,” “end of the day,” and “can I ask.” Record three versions: reading from text, repeating after audio, and speaking from memory. The difference reveals whether the problem is decoding, articulation, or confidence. Another practical method is backchaining. Build a phrase from the end: “up,” “it up,” “pick it up.” This reduces cognitive load and lets the mouth learn the link. If possible, use headphones and a quiet room, because low-quality monitoring hides the subtle glides and releases that matter most in linking practice.
Mini-quiz and hub guidance for broader speaking practice
Use this quick mini-quiz to check your understanding. Which phrase most likely includes a /j/ glide: “see it” or “go out”? The answer is “see it,” because the front vowel encourages a /j/-like transition. Which phrase most likely includes a /w/ glide: “do it” or “red apple”? The answer is “do it,” because the rounded vowel supports /w/. In “last time,” should you release both final and initial consonants strongly? No. A smoother production usually merges them into one cleaner transition. In “pick it up,” where should the pause go? Ideally nowhere inside the phrase unless you are adding emphasis. Finally, if your speech sounds choppy, should you practice isolated words only? No. Practice chunks and record transitions between words.
As a hub within Speaking, this miscellaneous page connects naturally to fluency building, sentence stress, weak forms, reductions, intonation, and listening discrimination. Linking sounds are not a minor extra; they are a control system for natural spoken English. When learners understand mouth position, practice high-frequency patterns, and use audio feedback consistently, they improve both clarity and speed of processing. The main benefit is practical: you become easier to understand and better able to understand others at normal speed. Start with ten phrases, record them daily for one week, and compare your speech with a trusted model. That simple routine produces measurable progress.
Frequently Asked Questions
What are linking sounds in connected speech, and why do they matter so much for ESL learners?
Linking sounds are the smooth sound connections that happen when one word ends and the next word begins in natural spoken English. Instead of pronouncing every word separately, fluent speakers connect words into thought groups and sound units. For example, “pick it up” is often heard more like “pi-ki-tup,” and “go on” may sound like “go-won.” This is not sloppy speech. It is a normal feature of spoken English, and it plays a major role in how rhythm, speed, and clarity work in real conversation.
For ESL learners, linking matters for two big reasons: listening and speaking. In listening, many students know the vocabulary on paper but fail to recognize it in fast speech because they are expecting each word to sound isolated. When words link, the boundaries seem to disappear, so familiar phrases suddenly sound unfamiliar. In speaking, learners who never practice linking often sound overly careful, choppy, or unnatural, even if their grammar is excellent. Their meaning may still be understood, but the speech flow can make conversation harder and less efficient.
Linking is also closely tied to stress, reductions, and the overall music of English. It helps speakers move smoothly from one syllable to the next without stopping the airflow too often. That is why it improves fluency without requiring learners to “speak faster” in an uncontrolled way. In fact, the goal is not speed at all. The goal is smooth, connected production. Once learners begin noticing linking patterns, they usually improve not only their pronunciation but also their ability to decode authentic English in movies, podcasts, meetings, and everyday conversation.
What are the most common types of linking in English connected speech?
Several linking patterns appear again and again in natural English, and understanding them gives learners a practical foundation. One of the most common is consonant-to-vowel linking. This happens when a word ends in a consonant sound and the next word begins with a vowel sound, as in “take it,” “turn off,” or “stand up.” In fluent speech, the final consonant usually moves forward and seems to join the next word. Learners should think in sounds, not spelling, because the sound connection is what matters most.
Another major pattern is vowel-to-vowel linking. English does not usually like two vowel sounds sitting next to each other with no transition, so speakers often insert a small glide. A /j/ glide, similar to the “y” sound, can appear after front vowels, and a /w/ glide can appear after back rounded vowels. That is why “see it” may sound like “see-yit,” and “go out” may sound like “go-wout.” These glides are subtle, but they are extremely common in natural speech and help maintain smooth movement between mouth positions.
A third pattern involves identical or similar sounds meeting across word boundaries. In phrases like “big game,” “last time,” or “red dress,” speakers may shorten, merge, or simplify the transition instead of fully pronouncing both sounds separately. This is where connected speech starts overlapping with assimilation and elision. Even though these are technically different processes, learners often experience them together in real speech. The key teaching point is that linked speech is not random. It follows physical speech habits that make pronunciation easier, faster, and more rhythmic. Training the ear to recognize these patterns is just as important as training the mouth to produce them.
How does mouth position affect linking, and what should learners physically do to sound more natural?
Mouth position is one of the most overlooked parts of pronunciation training, yet it is essential for linking. Smooth connected speech depends on efficient movement of the lips, tongue, jaw, and airflow. If a learner stops the mouth too strongly after every word, speech becomes segmented. Natural linking happens when the articulators keep moving forward into the next sound rather than resetting completely between words. In simple terms, the mouth should prepare early for what comes next.
For consonant-to-vowel linking, learners should avoid adding a pause after the final consonant. Instead, they should release the consonant directly into the next vowel. For example, in “pick it up,” the final /k/ of “pick” should connect immediately to the vowel in “it.” For vowel-to-vowel linking, the mouth should glide between shapes rather than jump abruptly. In “go out,” the lips round for /oʊ/ and then move into the next vowel with a light /w/-like transition. In “see it,” the tongue and lips move through a light /j/-like glide because the mouth is already in a high front vowel position.
One useful habit is to practice phrases, not single words. Learners can say “an apple,” “turn off,” “go away,” and “pick it up” while watching in a mirror or recording themselves. They should check whether the jaw freezes between words, whether the lips over-close, or whether they are inserting extra breaks. A good physical cue is this: keep the airflow and intention moving forward. Another is to mark the final sound of one word and the first sound of the next as a single pronunciation unit. When learners focus on continuous movement rather than isolated word production, linking becomes much easier and more natural.
What are the best audio practice tips for improving linking sounds in listening and speaking?
The most effective audio practice begins with short, clear phrases rather than long conversations. Learners should first listen to a native or highly proficient speaker pronounce a short chunk such as “find out,” “come in,” “go on,” or “leave it alone.” Then they should replay it several times and identify exactly where the words connect. This stage is critical because many students try to imitate before they can actually hear the linking pattern. Careful listening must come first.
After noticing the link, shadowing is one of the strongest training methods. In shadowing, the learner repeats the phrase immediately after the speaker, trying to copy not just the sounds but also the timing, stress, and flow. It helps to start slowly, then move to natural speed. Recording and comparing is also extremely valuable. When learners record themselves and listen back next to the model audio, they often notice extra pauses, missing glides, or overly strong word endings. These small differences are exactly what separate textbook pronunciation from natural connected speech.
Another excellent strategy is loop practice. Choose one phrase, play it five to ten times, and repeat it in sync until the linking feels automatic. Then place that phrase inside a full sentence. For example, practice “turn off,” then “Please turn off the light,” then “Could you turn off the light for a minute?” This builds transfer from drill work into real communication. For listening, learners should also use transcripts. First listen without reading, then listen while following the text, and finally underline places where the spoken form sounds different from the written form. Over time, this trains the brain to expect connected speech rather than fight it. Consistent short practice sessions, especially with high-frequency phrases, are far more effective than occasional long sessions.
How can teachers and learners use a mini-quiz to check progress with linking sounds?
A mini-quiz is a practical way to turn passive awareness into active skill. The best quizzes do not only ask for definitions. They test whether learners can hear, identify, and produce linking in realistic speech. For listening, a teacher might play short phrases and ask students to choose what they heard: “an apple” versus “a napple,” or “go out” versus “go-wout” as a description of the sound connection. Another useful format is marking the link point in a sentence, such as identifying where the consonant attaches to the following vowel or where a glide appears between vowels.
For speaking, a mini-quiz can include phrase reading, sentence repetition, and error correction. A learner might be asked to read phrases like “pick it up,” “far away,” “turn on,” “I agree,” and “go over,” while the teacher listens for smooth transitions. A stronger version includes self-assessment: the learner records each item, listens back, and decides whether there was a pause, an inserted sound, or a natural link. This kind of metacognitive practice helps learners become more independent and more accurate over time.
To make the quiz genuinely useful, it should focus on patterns that appear often in everyday English. A short five-item or ten-item quiz is enough if it is targeted. Teachers can include mixed tasks such as multiple choice, underline-the-link, listen-and-repeat, and phrase transformation. For example, students can compare “He is” said carefully versus in natural speech, or decide which version sounds more fluent in context. The goal is not perfection on a single test. The goal is to check whether the learner is becoming better at noticing connected speech, reproducing it with the right mouth movement, and carrying it into spontaneous speaking. If a mini-quiz is repeated regularly with similar phrase types, progress becomes much easier to measure and much more motivating for the learner.